Camhipro Alarm Settings.
Now that you've got your camera set up on the app you can spend some time setting up the cameras alarm and notification settings to fit your needs.
Here you will learn how to configure your camera to alert you to movement and intrudes. And how to set the camera to record when triggered.
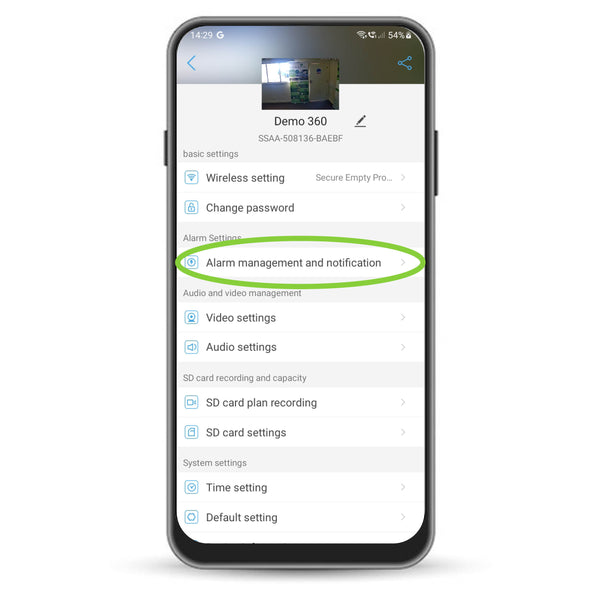
Navigate to the Camhipro app and select the camera you want to manage.
Tap the settings icon.
Tap, 'Alarm management and notification' as highlighted.
Be aware that the images in this guide are Android screens, Apple IOS screens may differ slightly.

Turn on Phone Alerts.
Here you can set the camera to send a detection alert to your phone.
Toggle 'Receive alarm push' to the right position to turn on alerts.
'Push name' refers to how the alert will appear on your phone home screen.
Adjust the name of the alert so it's easy to identify. This is helpful if you have multiple cameras.
Make sure the app has permission to send alerts in phone settings.
Motion & Humanoid Alarms.
Here you will learn how to manage the camera's different types of alarm.
Motion and humanoid alarms have different benefits and using the wrong one will be an inconvenience.
Motion Detection.
All movement in front of the camera will trigger an alarm. This includes, animals, foliage, loose items, humans and cars.
This setting is particularly effective with wildlife monitoring.
The higher the sensitivity rating the more movement it will pick up.
When adjusting the sensitivity you can set a box around the area you want an alarm to trigger.
Make sure you tap 'Apply' to save your settings.
If you only want human alerts, turn this setting off.


Humanoid Alarm.
The camera will only trigger an alarm when a human form is detected.
Toggle the switch on to recieve a notification when triggered.
By turning on 'Frame human form' a yellow box will appear around the subject. This will help you identify where the subject is.
'Alarm Trigger' - if you're using both motion and humanoid alrm then we recommend using 'Linkage trigger', it will minimise false activations.
If you're using one or the other change it to 'Alone trigger'.
Setting Notifications Schedule.
You can schedule when you want the alarm to be triggered. This is separate to planned recording times.
A useful feature if an area is particularly busy at certain times of day.
Here we will cover how to set the camera to trigger outside office hours.
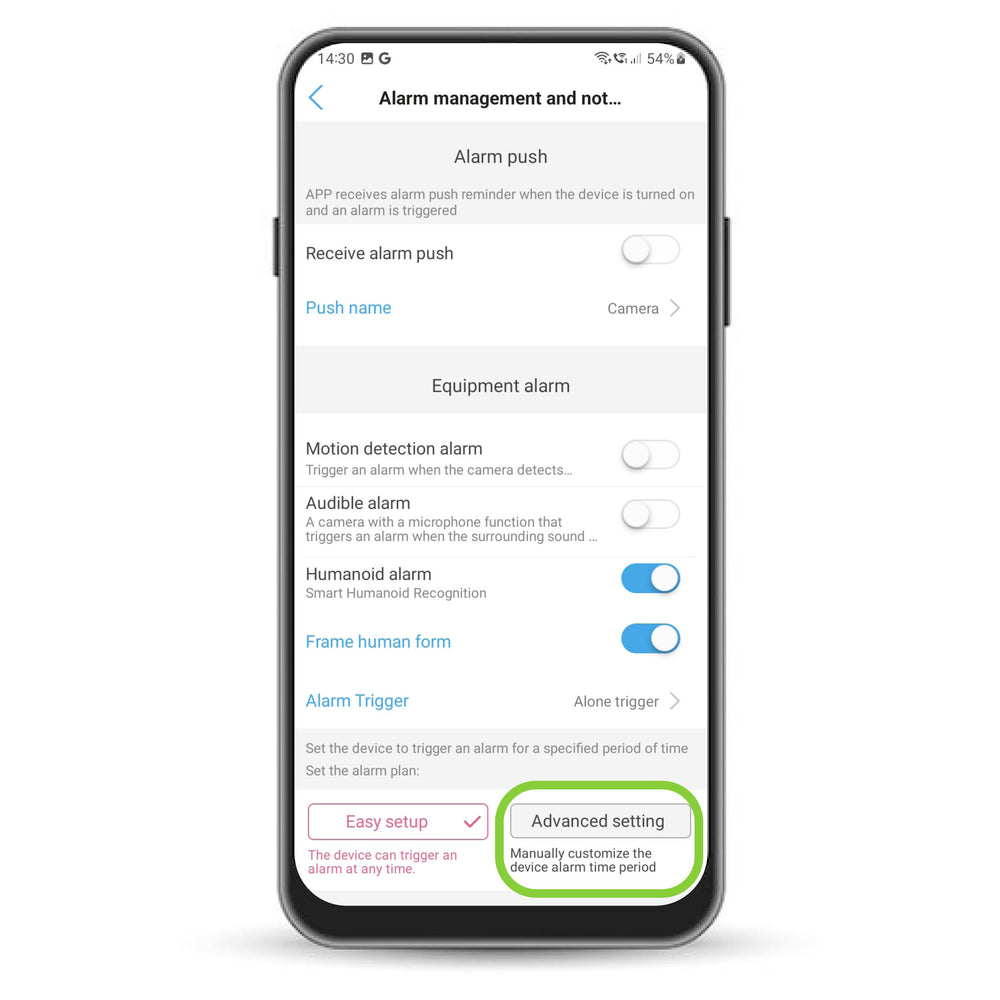
Tap Advanced setting
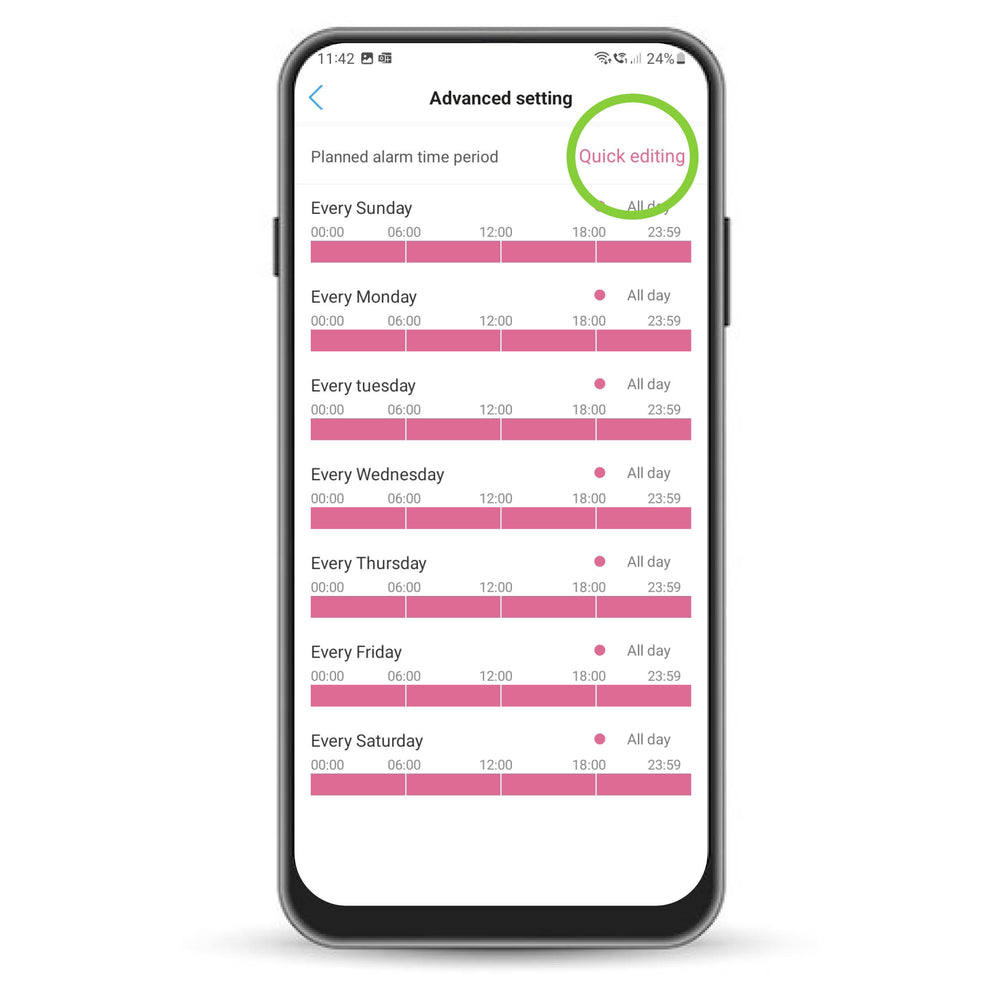
Tap Quick editing
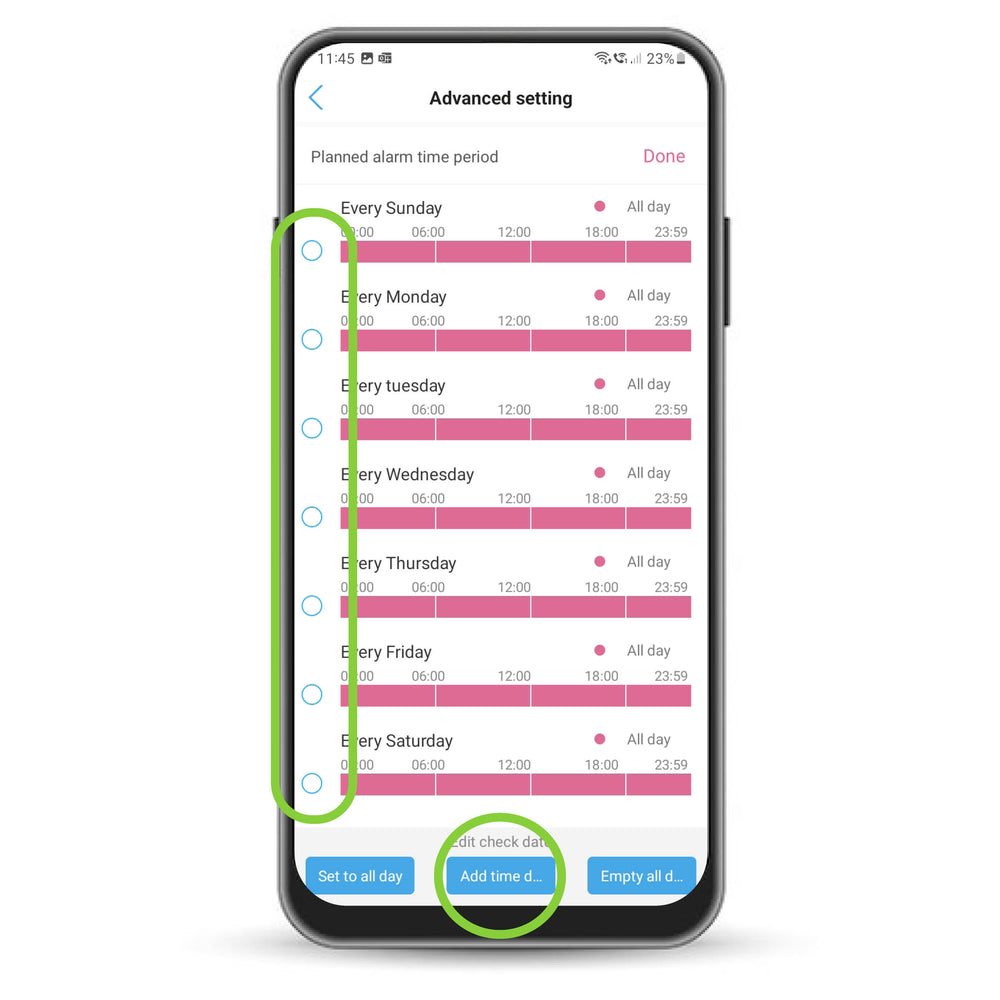
Select the days you want to edit and tap 'Add time domain'

Set the time you want the alarm to start and end
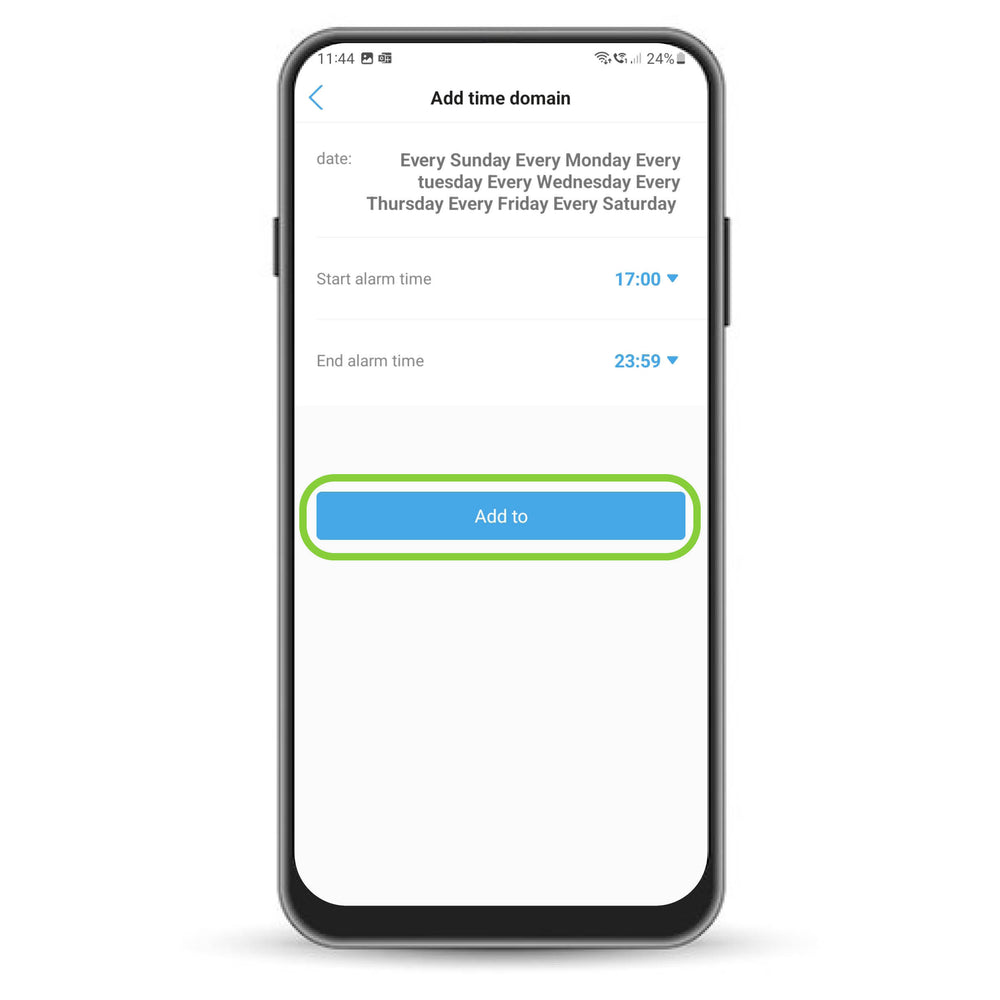
Set the second time period.
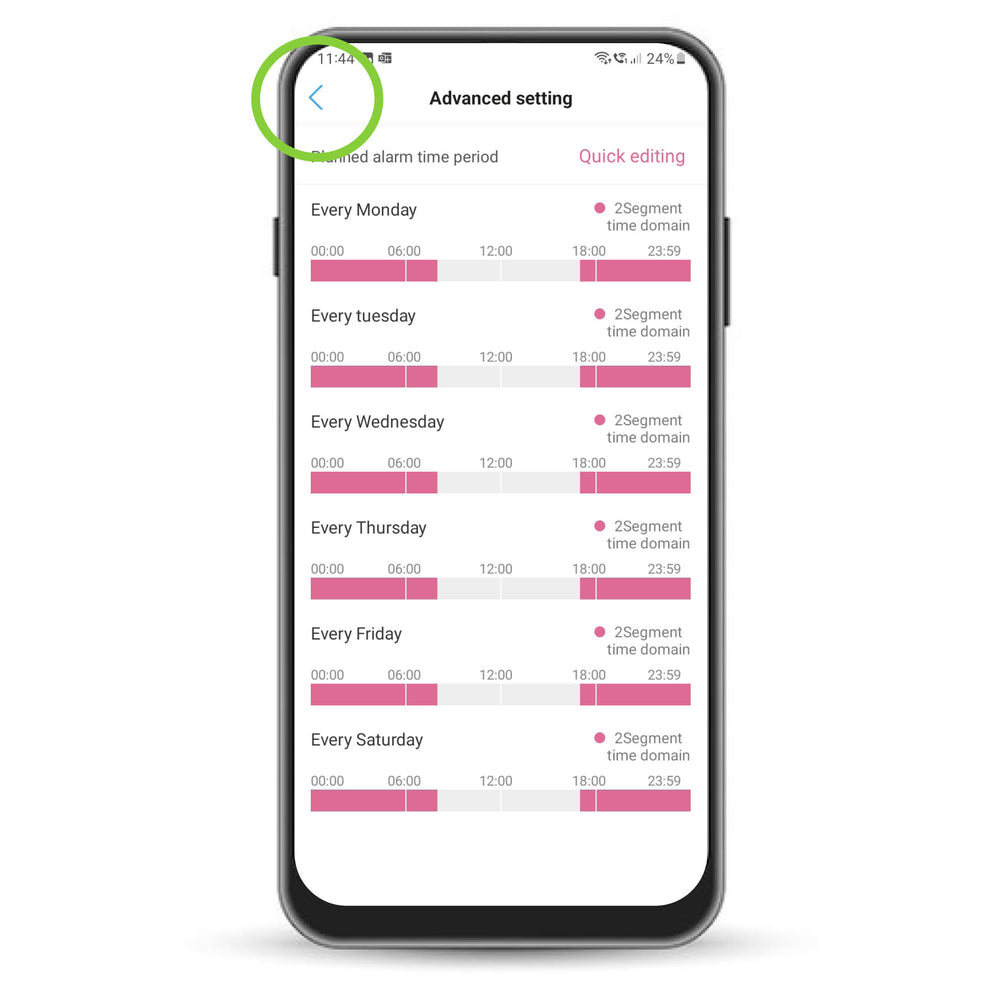
Tap back to return to the menu
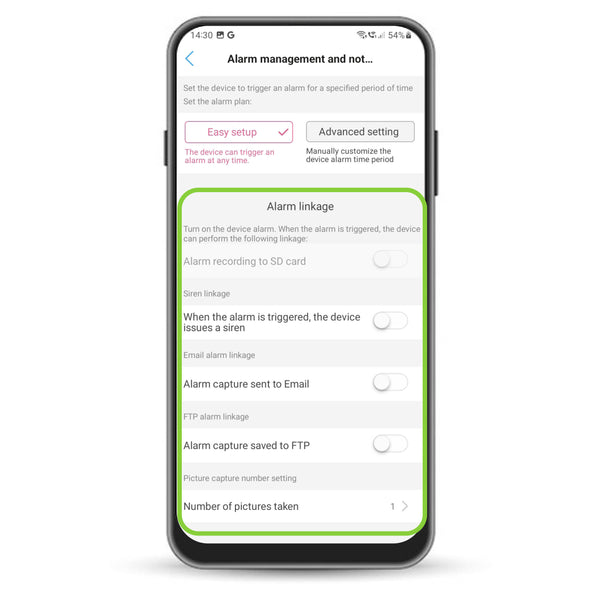
Other Settings.
- Alarm recording to SD card: Alarm triggers will be recorded to the SD card. An SD card must be inserted for this feature to be available.
- When the alarm is triggered, the device issues a siren: If the speaker is connected, the siren will sound.
- Alarm capture sent to email: When the alarm is triggered you will recieve an image in an email. Find the setup guide here.
- Alarm capture saved to FTP: When the alarm is triggered, the recording will be saved to a cloud server. Find the setup guide here.
- Number of pictures taken: The number of images that will be sent to the cloud or your email.